Thursday, April 30, 2009


Wednesday, April 29, 2009
First Dance Done Right.
enjoy. elle.
Completely Off-Topic...
elle

Tuesday, April 28, 2009


Monday, April 27, 2009
"No More Excuses!"

Sunday, April 26, 2009
Perfectly Pink.

Saturday, April 25, 2009
The Perfect Wedding Gift.
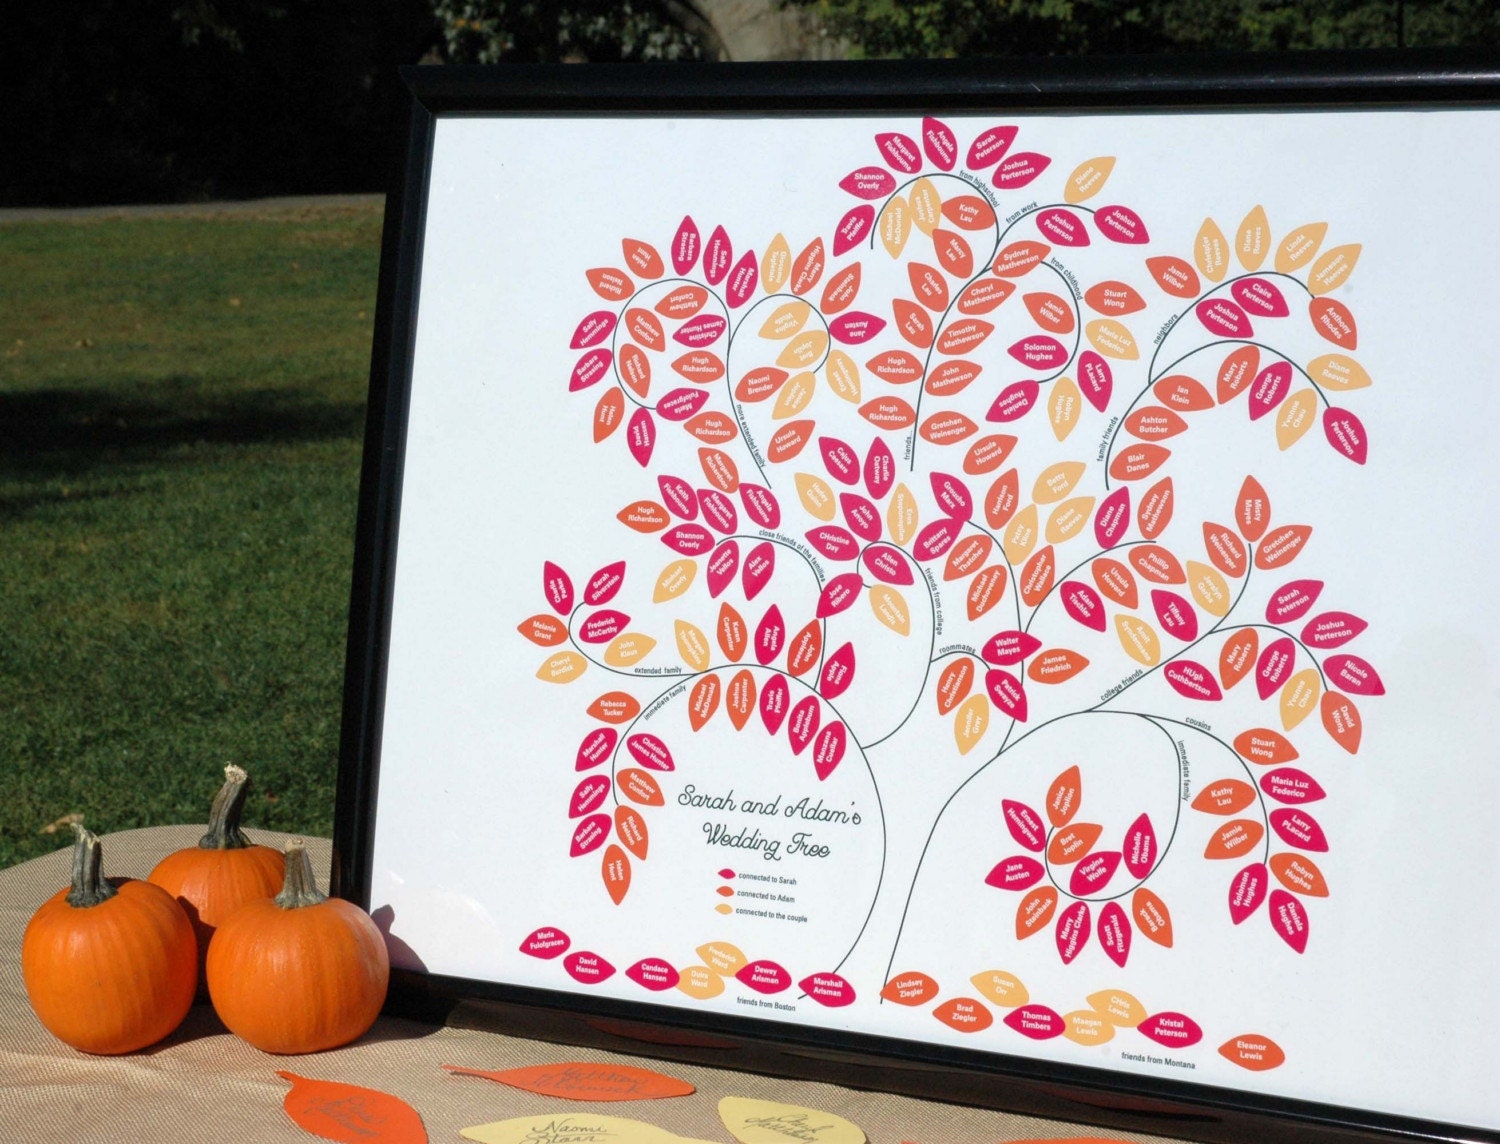
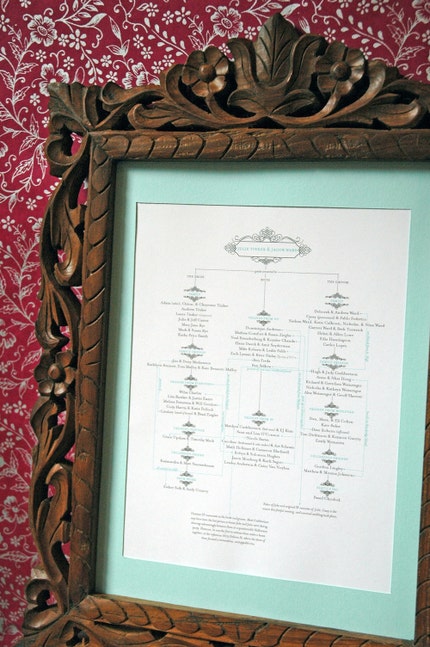
When your brother, sister, daughter or mother gets married, you don't necessarily want to get them a fruit bowl that they have registered for. So, when finding something truly unique and personal to give to the newly weds I get extremely excited. Mélangerie Inc, is a wonder company turns your family history into art. These are gifts that your couple will keep forever and never tire to look at. One of the most important things about getting married is that you are combining families and representing these beautiful additions are a fantasic gift idea.
Thursday, April 23, 2009
its all in the details. S'MORES!


Wednesday, April 22, 2009
A-Dorable!
- Fairest of Them All Silk Taffeta Wedding Dress - Holly Stalder
- Perfect Palettes: Pink and Gold - Martha Stewart Weddings
- Pictures Without Borders - Martha Stewart Weddings
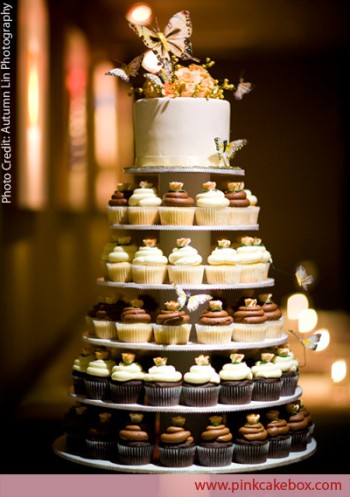
- Present Perfect Cake - Martha Stewart Weddings
- Perfect Palettes: Using Pink - Martha Stewart Weddings
- Bowl Em Over Table Arrangement - Martha Stewart Weddings
- Martinez Valero 'Waverly' Pumps - Nordstrom
- 14k Raw Circle White Sapphire Solitaire Ring - singleB: beautiful
Tuesday, April 21, 2009
Love. Love. Love.


Preparing.
Like in life I am coming to find that more organized I am with this wedding, the less I am having to stress. Me and the Mr. are pretty good with filing and storing the important info in a easy and accessible manner. Now that we are starting to sign contracts, gathering tons of receipts and will soon be receiving RSVP's, I thought I would reference this amazing designer Mindy Weiss. Her stuff is not pricey, and with all the stress it will save you I would consider it a fantastic investment. Also, these may be a great idea for an engagement gift for a friend getting married!

(photo from wedding chicks)
Friday, April 17, 2009
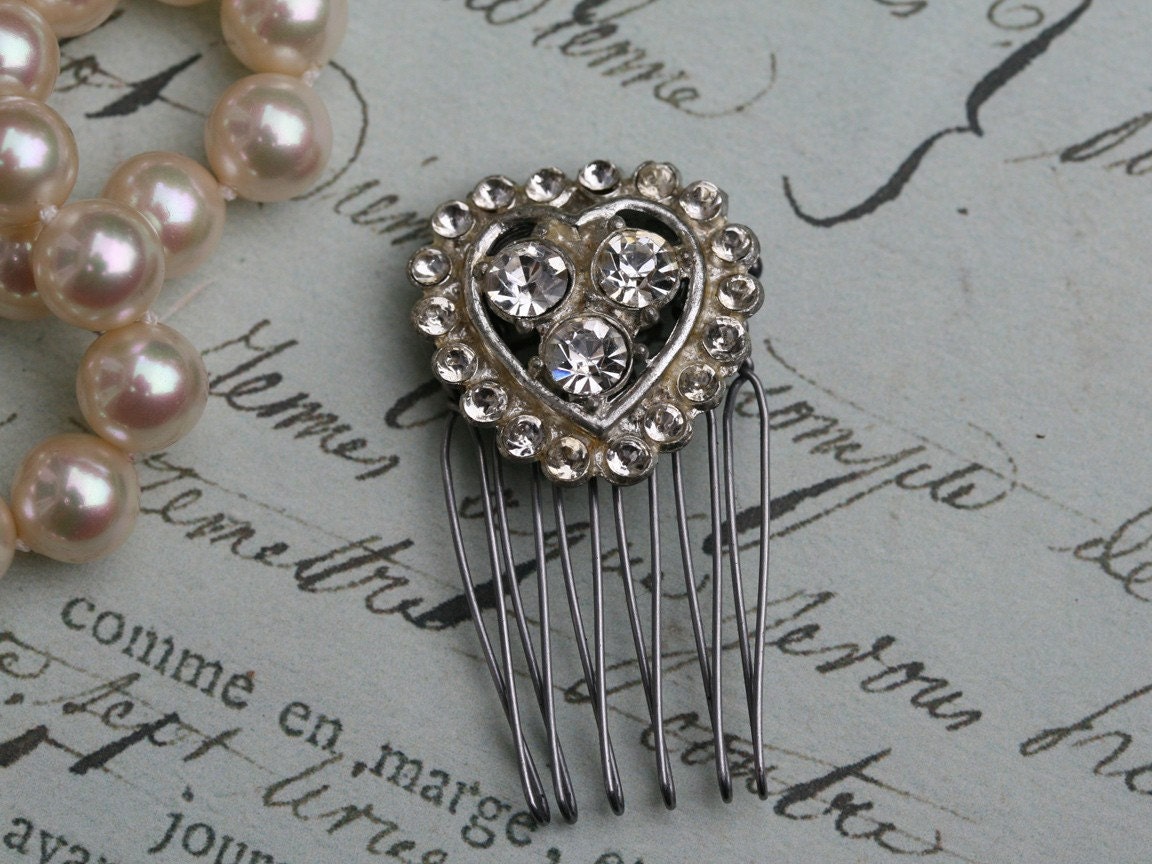
Bridesmaids Gifts.
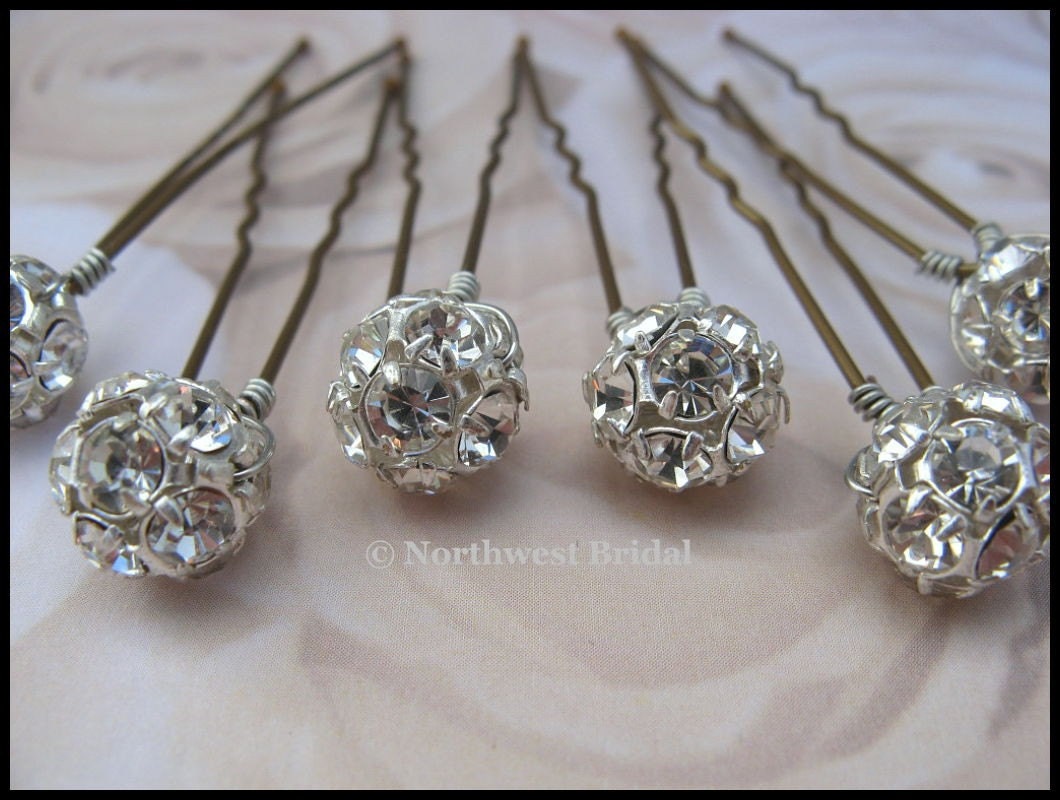
Believe me, if I was rich I swear I would shower my bridesmaids with "thank you gifts", and probably have about 10 more of them too. I am finding myself constantly searching websites and bookmarking all the things I would love to put in a gift bag for them... When I saw these pins by Northwest Bridal, I almost immediately added them to my Etsy Cart... I hope I am not getting carried away considering I do have 7 more months of shopping online! Ok, so maybe I will just add it to my favorites for now. ;) arent they adorable.
. elle
Bridal Budget!
Want to make your own? Keep reading to find out how!
- Tissue paper
- Scissors
- 2 large paper clips
- Pipe cleaners (chenille stems) or floral wire
- Coloured marker pen
- Optional: floral wire, floral tape, wire cutters


Cut the floral wire to the same length as your stem.


Make just one as a paper buttonhole. Make about a dozen, and you have a beautiful bouquet!

xoxo elle.
Thursday, April 16, 2009
The Bridesmaid.


Me and Ali were on a hunt today for the perfect bridesmaid dress. And it all came back to the same place, after many stores, we went with the J. Crew. It was the most fair in prices, and we felt that they were made the best. In the end we chose one strapless, and one halter. I am so pleased and had the best day with my lovely MOH. I think I am going to get my bridesmaid some sort or pin or broach, and they can wear it where ever they want on the dress to jazz it up a bit. Also I have decided that it would be really to have the girls in really bright color shoes (maybe alternating in colors). Let the drooling ensue.


The Save the Date is DONE.

After much debate the Mr. and I finally decided on the Save the Date! When I saw these from Paperwink, I feel in love. I feel extremely accomplished and I couldn't wait for my friends and family to receive them in order to not spoil the surprise... so here it is! Sorry you wont be seeing it in your mail box first- but it will have different info so there!
Let me know what you think!
Monday, April 13, 2009
Awww cute

Friday, April 3, 2009
You can pin me anytime!
I know how much Elle (and many-a-folk) love Etsy! Well, once upon a time, when I had an uber amount of time on my hands, I perused Etsy hours and hours at a time. I stumbled across this, and bookmarked it, because I thought it was unique and green! (I'm all about making things as green as possible, whenever possible. It really is about all the little things you do. No one is asking you to go live in a hut in the jungle. ;-) ) OK, off my little soap-box, on to the loveliness:
 http://www.etsy.com/shop.php?user_id=5060316
She does custom-made boutonnieres (as well as other beautiful, one-of-a-kind wedding pieces), letting the purchaser (aka Elle) choose the color and look of the piece. She does make each one slightly different so each groomsman has a unique piece.
This is a great option for anyone not wanting to worry about refrigerating flowers just to have them die and be tossed (*sad face*) at the end of the night. It's an extra little something the groomsmen can take with them, and maybe even use again!
Thursday, April 2, 2009
Satisfying and Healthy Options
I hope that you all have had a great week. Today is my Friday (One of the perks for having a Federal job). Any who... I thought I would share some of my favorite breakfast muffin recipes. Now usually when you think of muffins, you think big buttery masses of fattening bread mixed with all sorts of unhealthy ingredients. Well my friends you are way off. I have mastered the art of substitution and half of my co-workers never can tell the difference between the full fat banana bread and the nonfat uber healthy alternative. Shhhh don't tell! Now as you all know, Elle is on the countdown to her wedding and along with that she is watching what she eats so that when the big day comes she will look her very best. First, lets talk about some substitutions that you can make when baking desserts. Anytime a recipe calls for butter or oil, opt for an alternative. Lately I have been using a lot of applesauce or pumpkin puree in place. What you are looking for is the moisture and texture of the baked good. Yogurt, low fat sour cream, apple butter, peanut butter or any type of natural fruit preserve will do. Sugar also seems to be added in mass amounts to our morning fuel. When we wake up in the mornings, our bodies have fasted for the past 8 hours more or less and need complex carbs along with natural glucose. Now you may think that your lucky charms or your NY Bagel are the perfect fit for that but in all reality you are just putting a processed and refined food into your body which will be used up quickly. This in turn leaves you feeling hungry more soon. Complex carbs and fiber help to keep us fuller! Now for the fun part. I am going to provide you with 2 recipes. One will be the full fat version and the other is the healthy alternative. You can see how easy it is to make small changes! Remember it all depends on what flavors you want to get out of your food! Happy and healthy eating here we come!
P.S. I use tastebook online to load all my recipes on! It is a huge paper saver!

Banana Crumb Top Muffins
3/4 cup all-purpose wheat flour
3/4 cup of wheat bran
1 teaspoon baking soda
1 teaspoon baking powder
1/2 teaspoon salt
1 teaspoon vanilla
2 banana
1/2 cup unsweetened applesauce
1 tsp banana extract
1/4 cup no calorie splenda
1/3 cup packed brown sugar splenda blend
1 teaspoon cinnamon
1 eggwhite, lightly beaten
Crumb Topping
2 tablespoons all-purpose flour
1/8 teaspoon ground cinnamon
1 tsp sugar free preserves
1/3 cup brown sugar splenda blend
1/2 tbls apple butter or butter substitute
(can always use Peanut Butter too!)
Directions
Preheat oven to 375 degrees F (190 degrees C). Lightly grease 10 muffin cups, or line with muffin papers. In a large bowl, mix together 1 1/2 cups flour, baking soda, baking powder and salt. In another bowl, beat together bananas, sugar, egg and applesauce. Stir the banana and pumpkin mixture into the flour mixture just until moistened. Spoon batter into prepared muffin cups.
Topping:
In a small bowl, mix together brown sugar, 2 tablespoons flour and cinnamon. Cut in 1 tablespoon butter until mixture resembles coarse cornmeal. Sprinkle topping over muffins. Bake in preheated oven for 18 to 20 minutes, until a toothpick inserted into center of a muffin comes out clean. Just under 100 Calories per Muffin!!
Full Fat Version
1 1/2 cups all-purpose flour
1 teaspoon baking soda
1 teaspoon baking powder
1/2 teaspoon salt
3 bananas, mashed
3/4 cup white sugar
1 egg, lightly beaten
1/3 cup butter, melted
1/3 cup packed brown sugar
2 tablespoons all-purpose flour
1/8 teaspoon ground cinnamon
1 tablespoon butter
DIRECTIONS
Preheat oven to 375 degrees F (190 degrees C). Lightly grease 10 muffin cups, or line with muffin papers.
In a large bowl, mix together 1 1/2 cups flour, baking soda, baking powder and salt. In another bowl, beat together bananas, sugar, egg and melted butter. Stir the banana mixture into the flour mixture just until moistened. Spoon batter into prepared muffin cups.
In a small bowl, mix together brown sugar, 2 tablespoons flour and cinnamon. Cut in 1 tablespoon butter until mixture resembles coarse cornmeal. Sprinkle topping over muffins.
Bake in preheated oven for 18 to 20 minutes, until a toothpick inserted into center of a muffin comes out clean.
(These babies pack in a whopping 270 calories per muffin, 9g of fat and 46g of carbs)
Peace and Hugs,
Ryan